How to Configure PIM (Privileged Identity Management) Access
Privileged Identity Management (PIM) is a service in Azure Active Directory (Azure AD) that enables you to manage, control, and monitor access to important resources in your organization. These resources include resources in Azure AD, Azure, and other Microsoft Online Services such as Microsoft 365 or Microsoft Intune.
PIM Features-
- Privileged Identity Management (PIM) will help you to manage, control and monitor access to the resources.
- PIM can be applying on resources are in Azure AD, Azure, and other Microsoft online services such as Microsoft 365 or Microsoft Intune.
- Organizations want to minimize the number of people who have access to secure information or resources, because that reduces the chance of
- A malicious actor getting access
- An authorized user inadvertently impacting a sensitive resource
- Using this feature requires an Azure AD Premium P2 license
Below are the steps to explain, how the can we configure PIM.
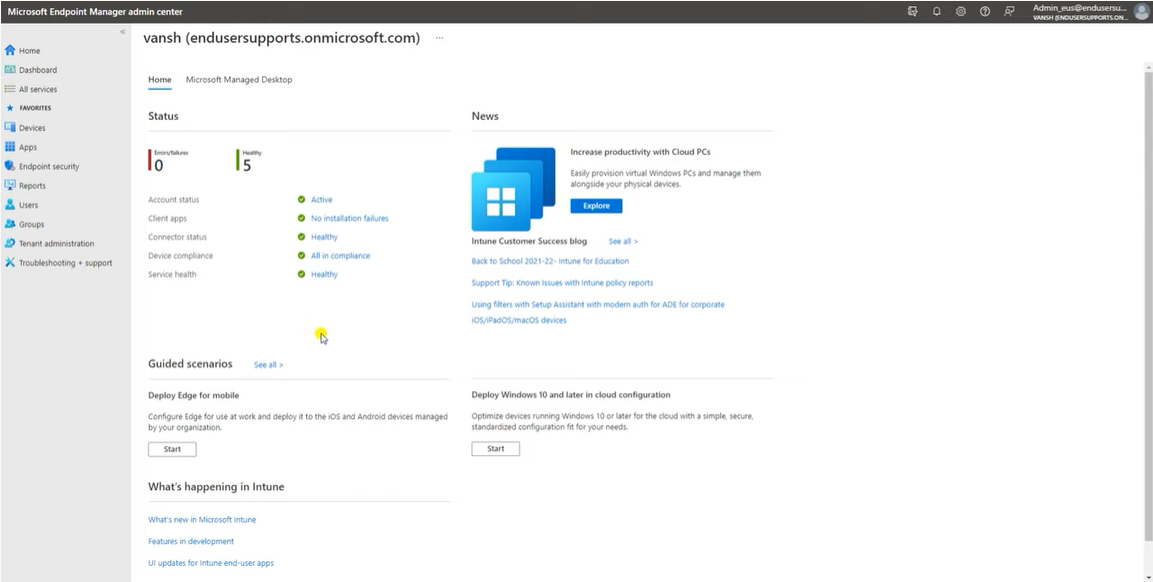
Login to Intune or Azure AD portal (account should have admin rights before start configuring PIM)
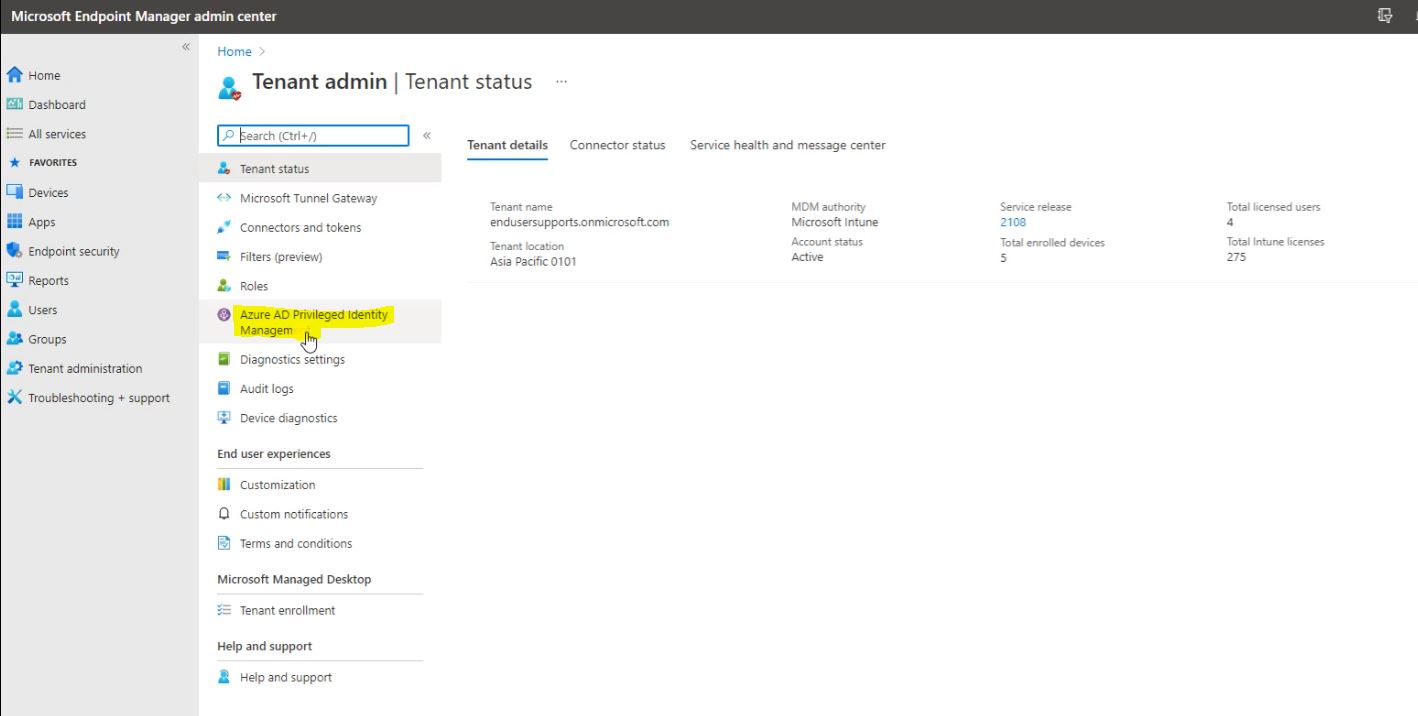
Go to the Tenant Administration then go to the Azure AD Privileged Identity Management.
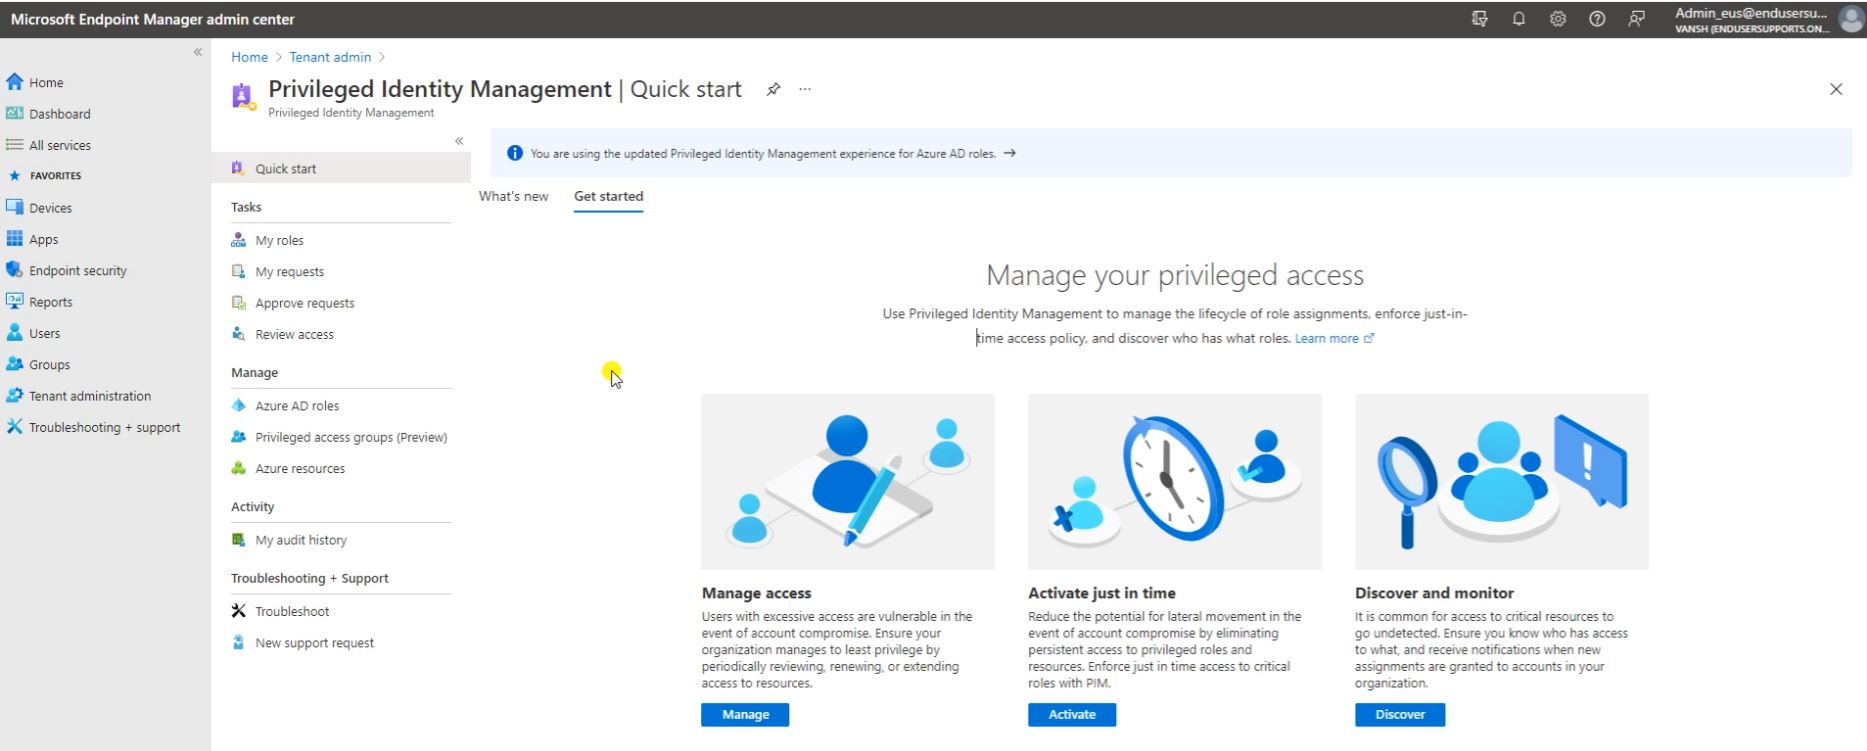
Follow the below screen and click on Azure AD Roles.
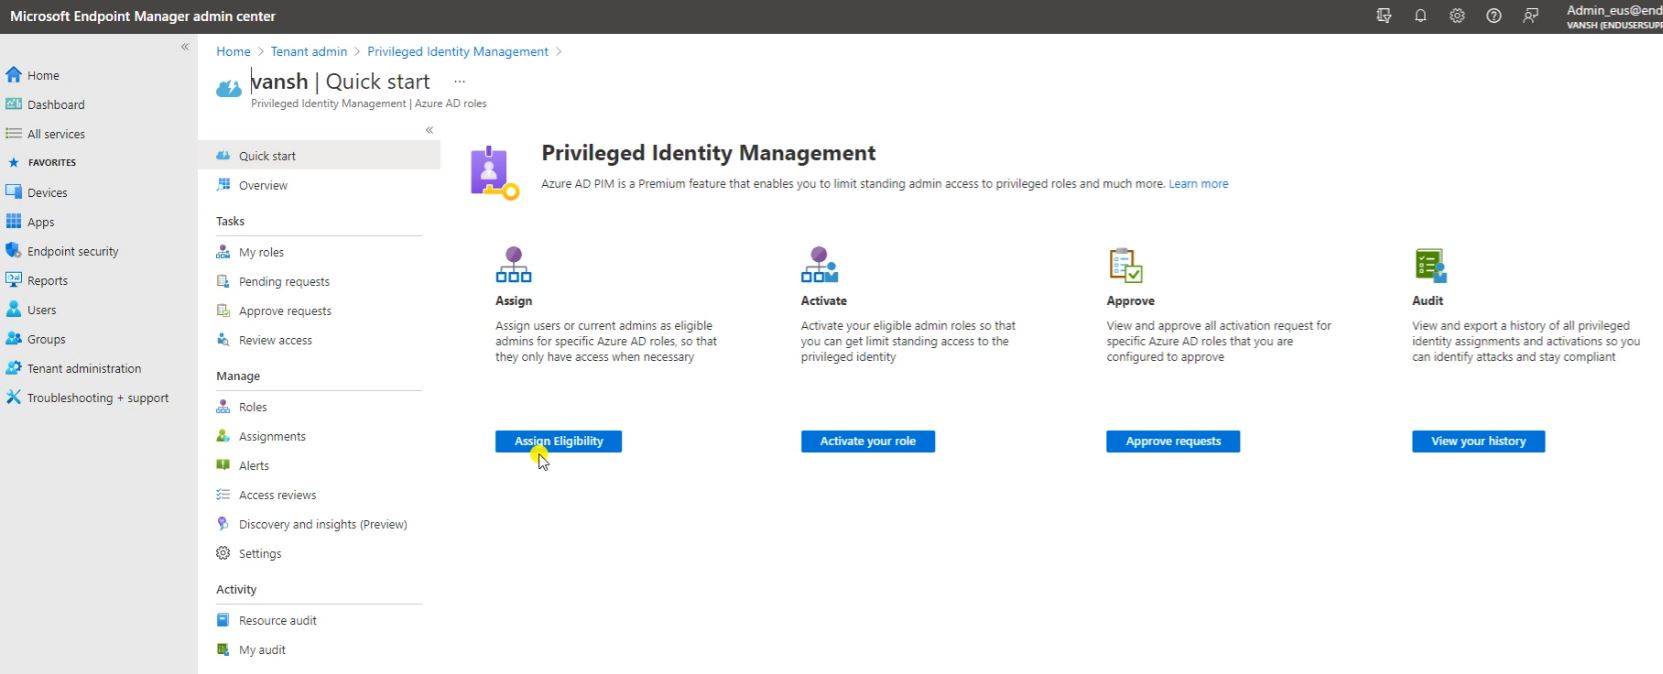
Now click on Assign Eligibility.
Here click on Roles. And check here what kind of Roles you want to assign for your the PIM access.

Search here Intune Administrator and open it.
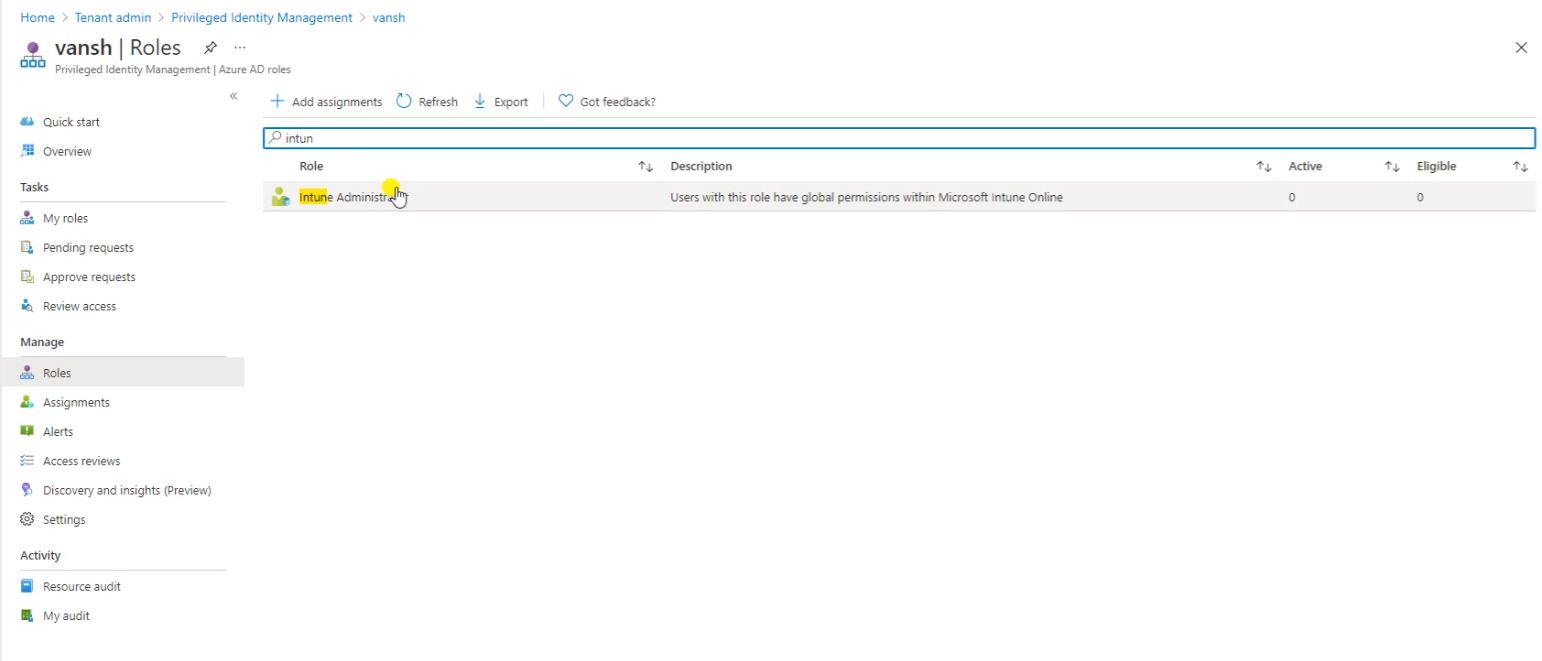
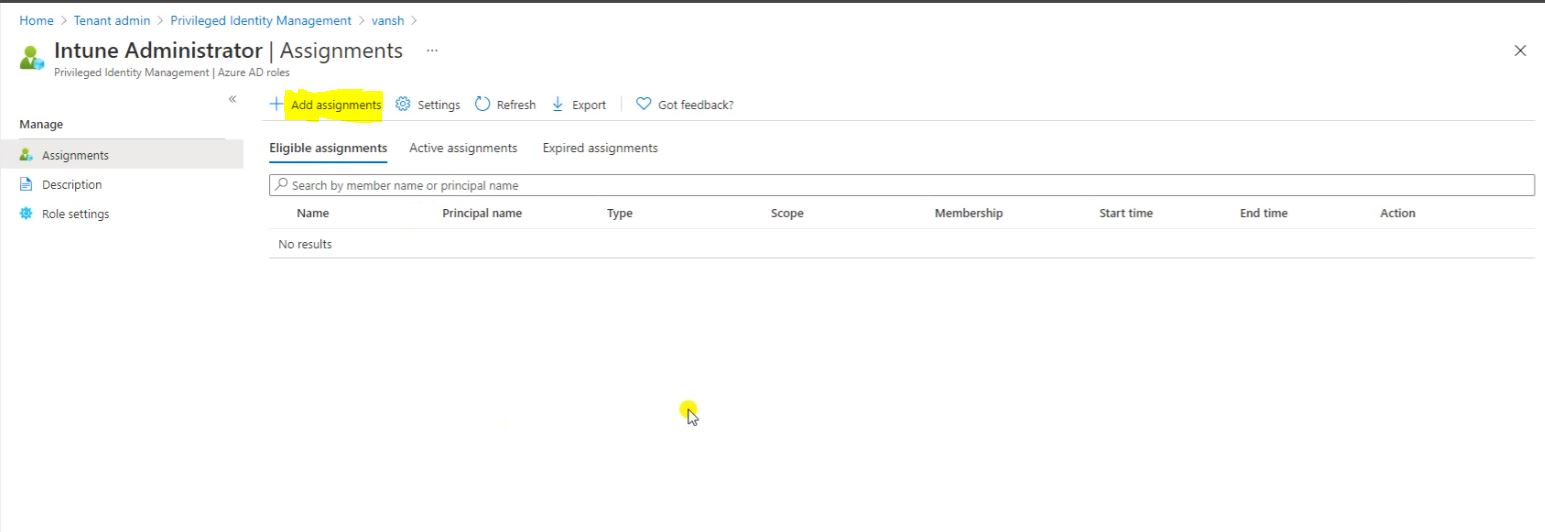
Here You can see no users are the part of the Intune Administrator. click on add assignments to proceed further.
Follow the below screen to add user.
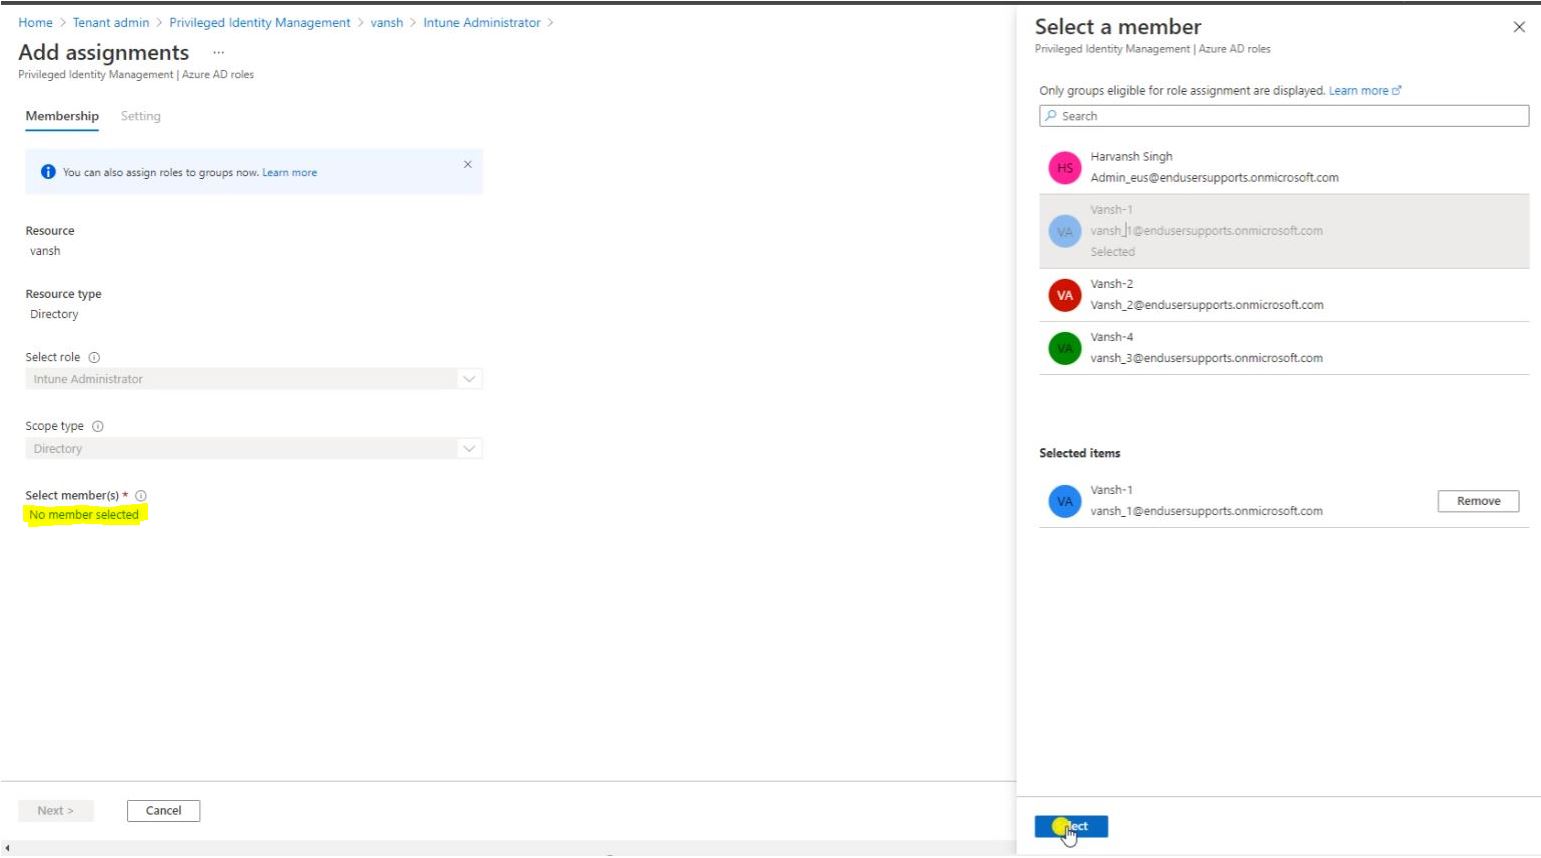
After selecting the user click on Next.
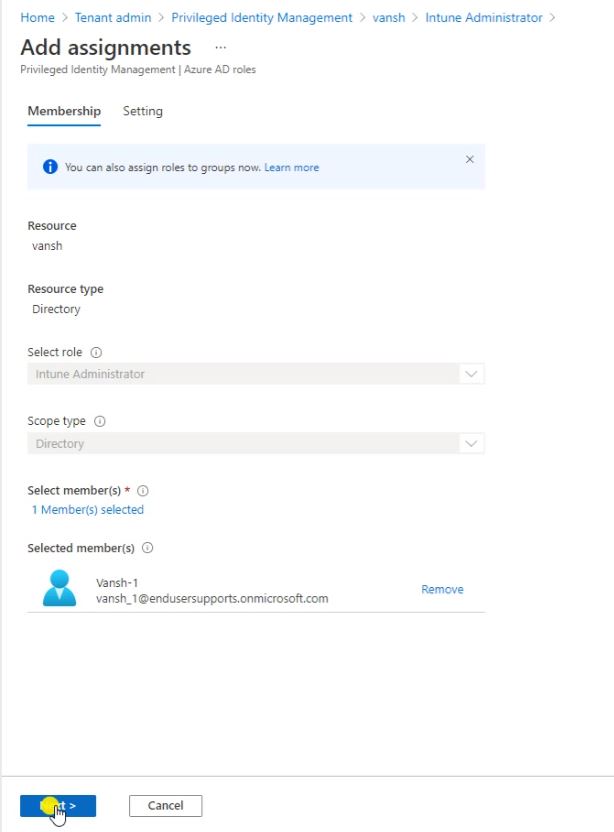
Select the assignments type-
- Eligible – You need a approver to approve the request.
- Active- No approver required, It will assign a permanent role.
If you select Eligible then define the timeline for your account eligibility.
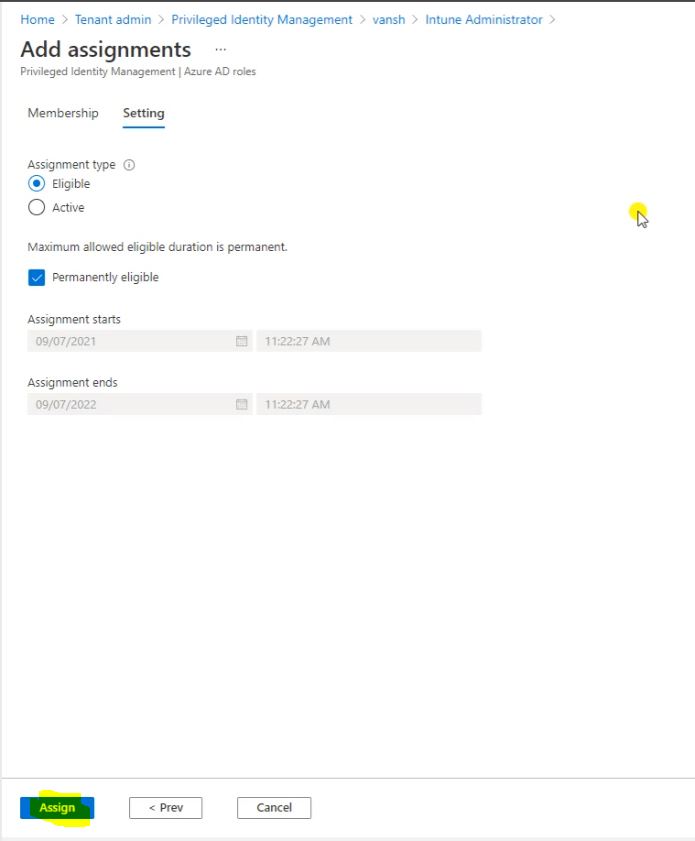
So now this role got Assigned and you can seen the User list here.

You can modify and remove the assignment if you needed.
Click on settings.

Click on Edit.
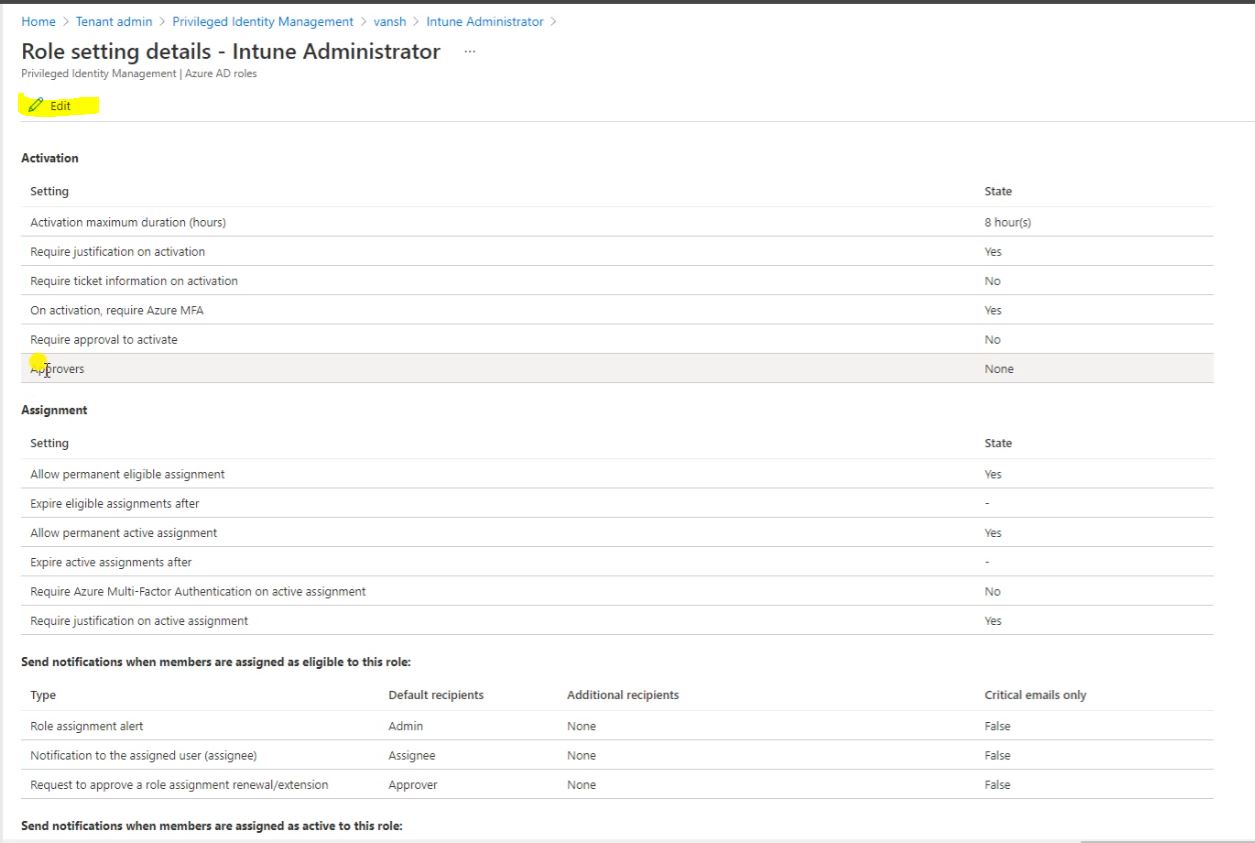
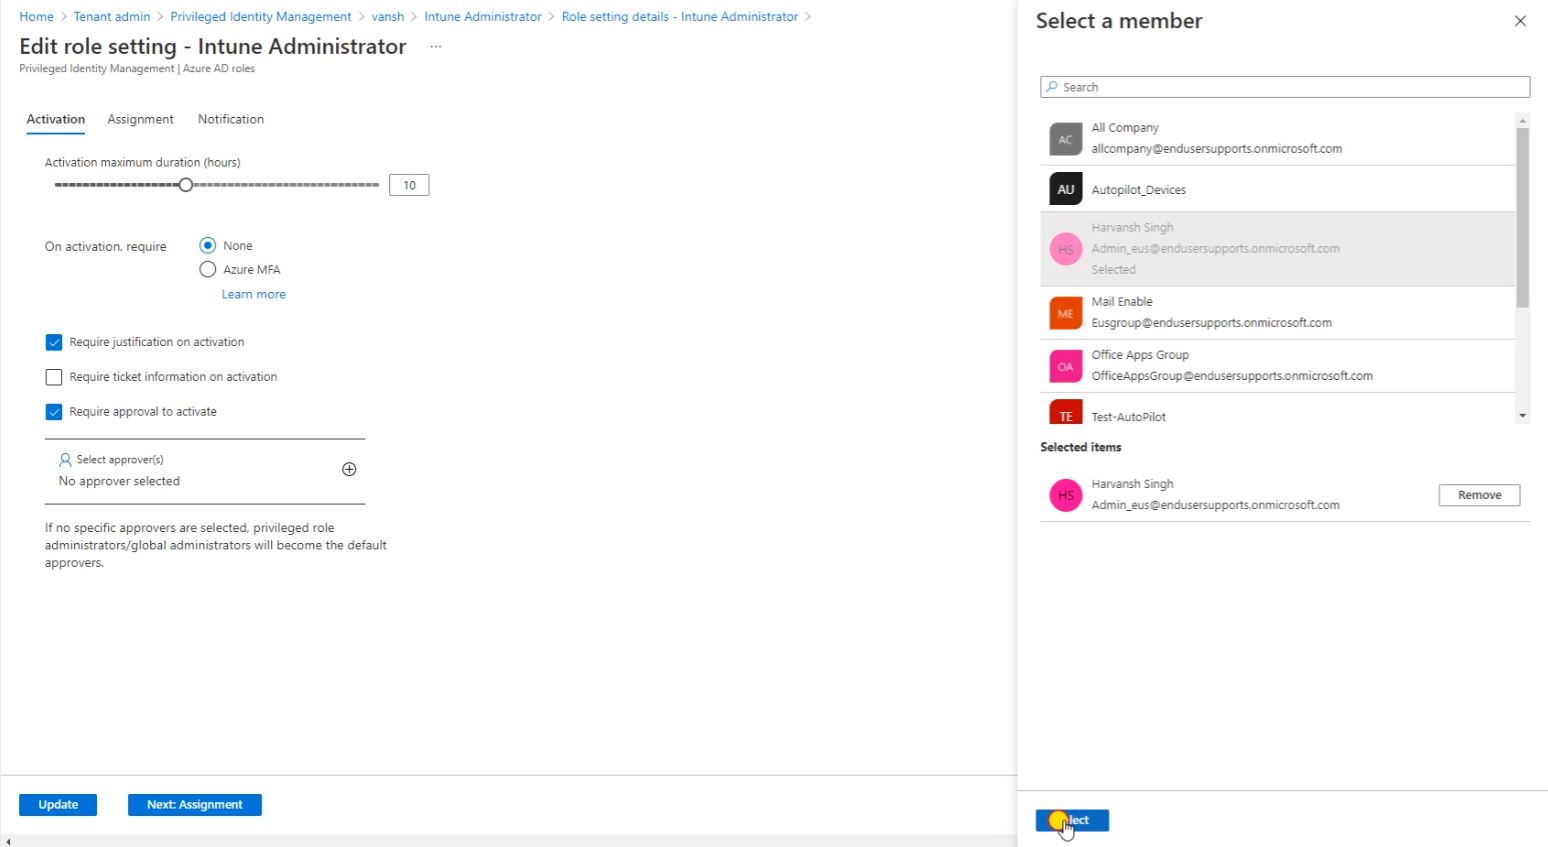
Assign the approver for the account. When user will raise a request that will go for the approval to this account.
After selecting the Approver or Member click on select.
So here you can see Approver for this request and define the time duration for the account rights eligible. I have set 10 hours limit so User can raise max 10 hours request it will be minimum 1 hour eligibility.
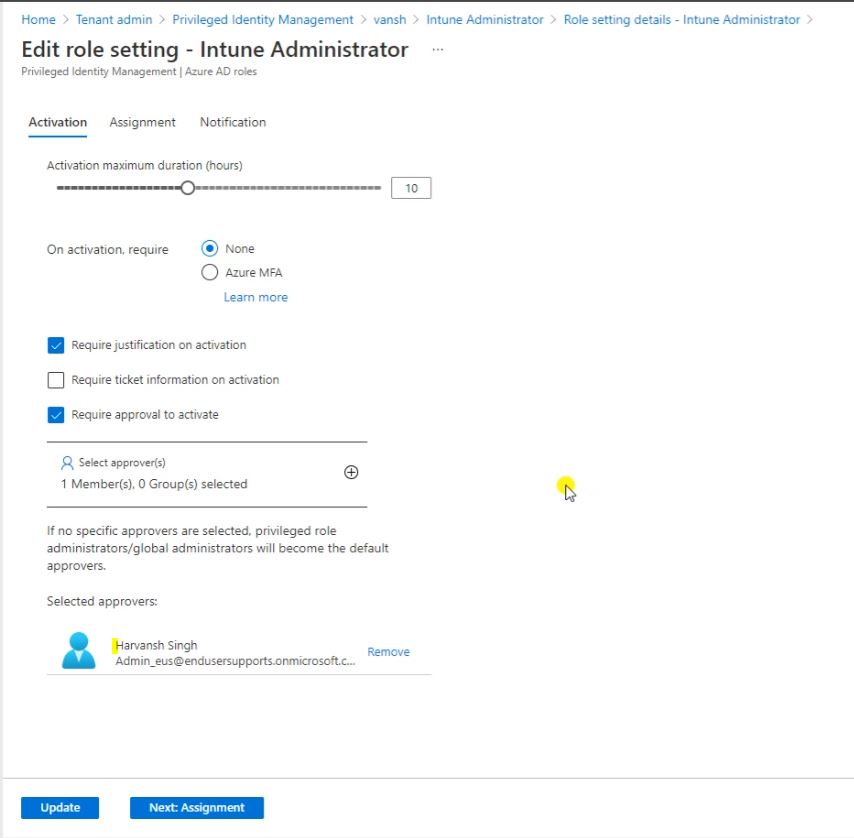
Then click on Next Notification.
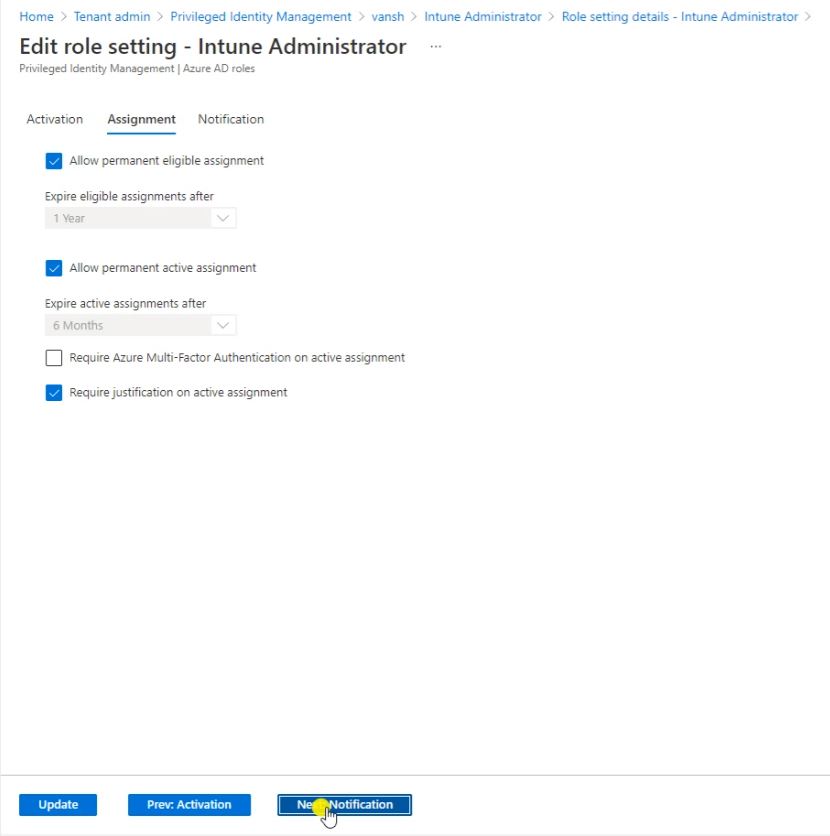
So here is the Notification, So when user is raising any of the PIM request who will get the Email or who will get the Notification. So here you can select.
After the selecting click on Update.
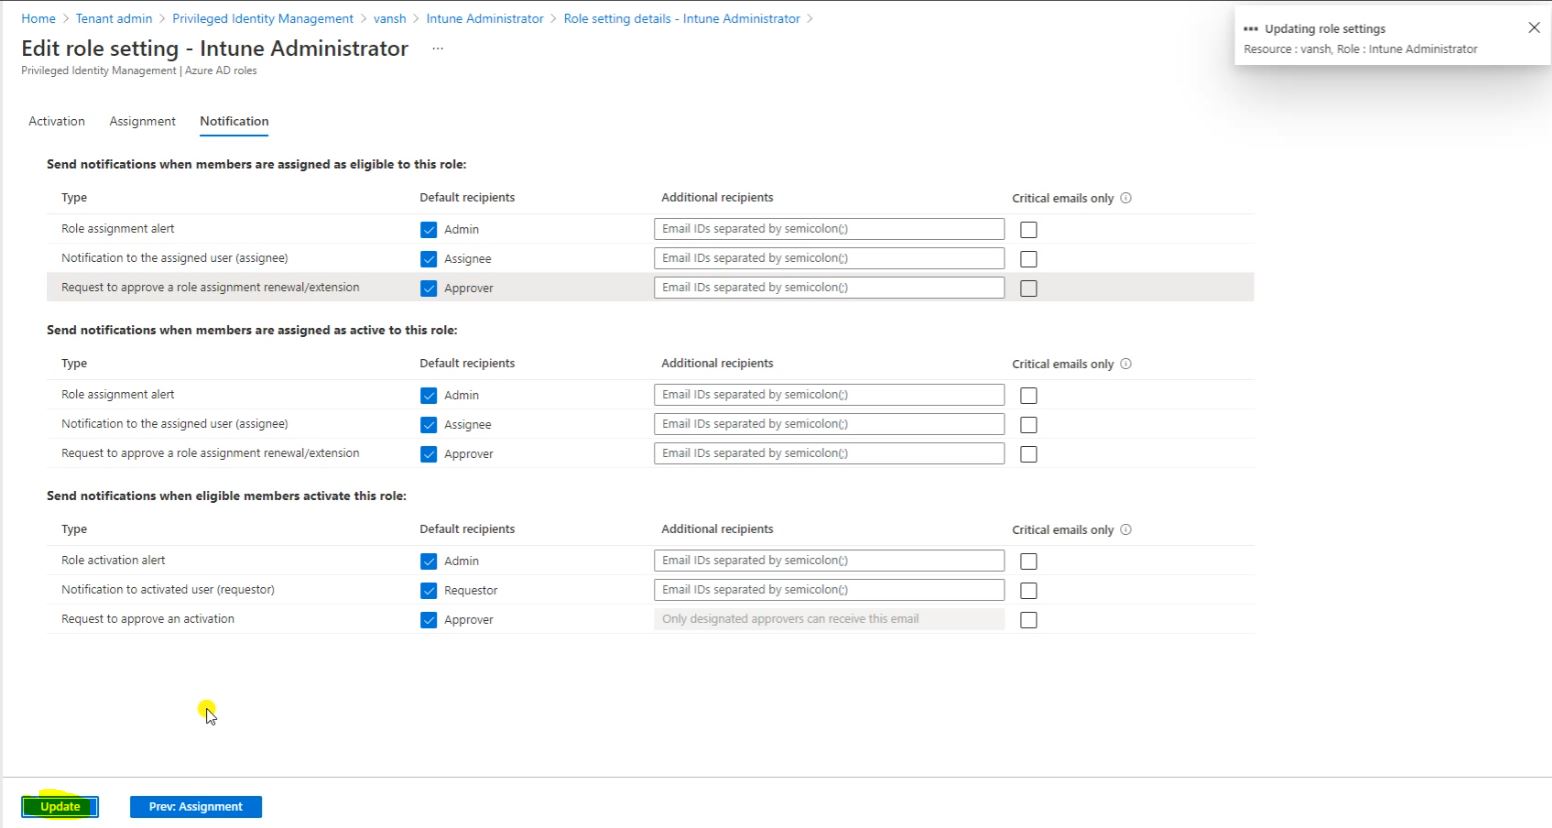
So now we have one user for this Intune Administrator who can eligible to raise a request or PIM access.

Then go again Azure AD Privileged Identity Management then go to the My Roles, So this is the role after assigning it will show you here.
So if I raise this request and click on activate, this user will having the Intune access in my Intune console.
So click on activate.

Here you can Increase or Decrease the duration hours. And click on Activate.
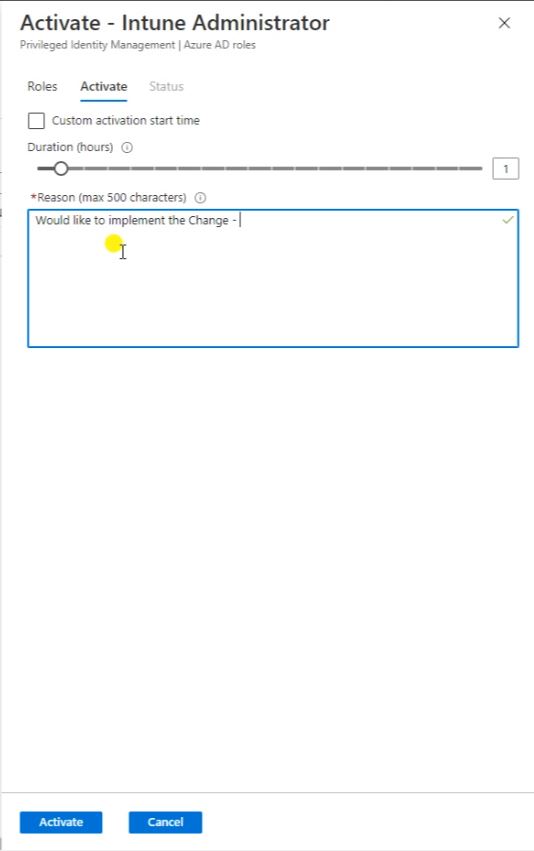
After request will go under My Request. Now the approver should approved this request first then only user will get the Intune Administrator Access.
Go to the Privileged Identity Management, go to the Approve Requests then click on Refresh. So as a approver you got this request Intune Administrator.
So click on the checkbox then click on the Approve button.
So users admin access will expire after exact one hour, here you can see Start time and End time. So after this hour user will not be having the admin access and again it will role back to the there is a Normal user. So click on the confirm.
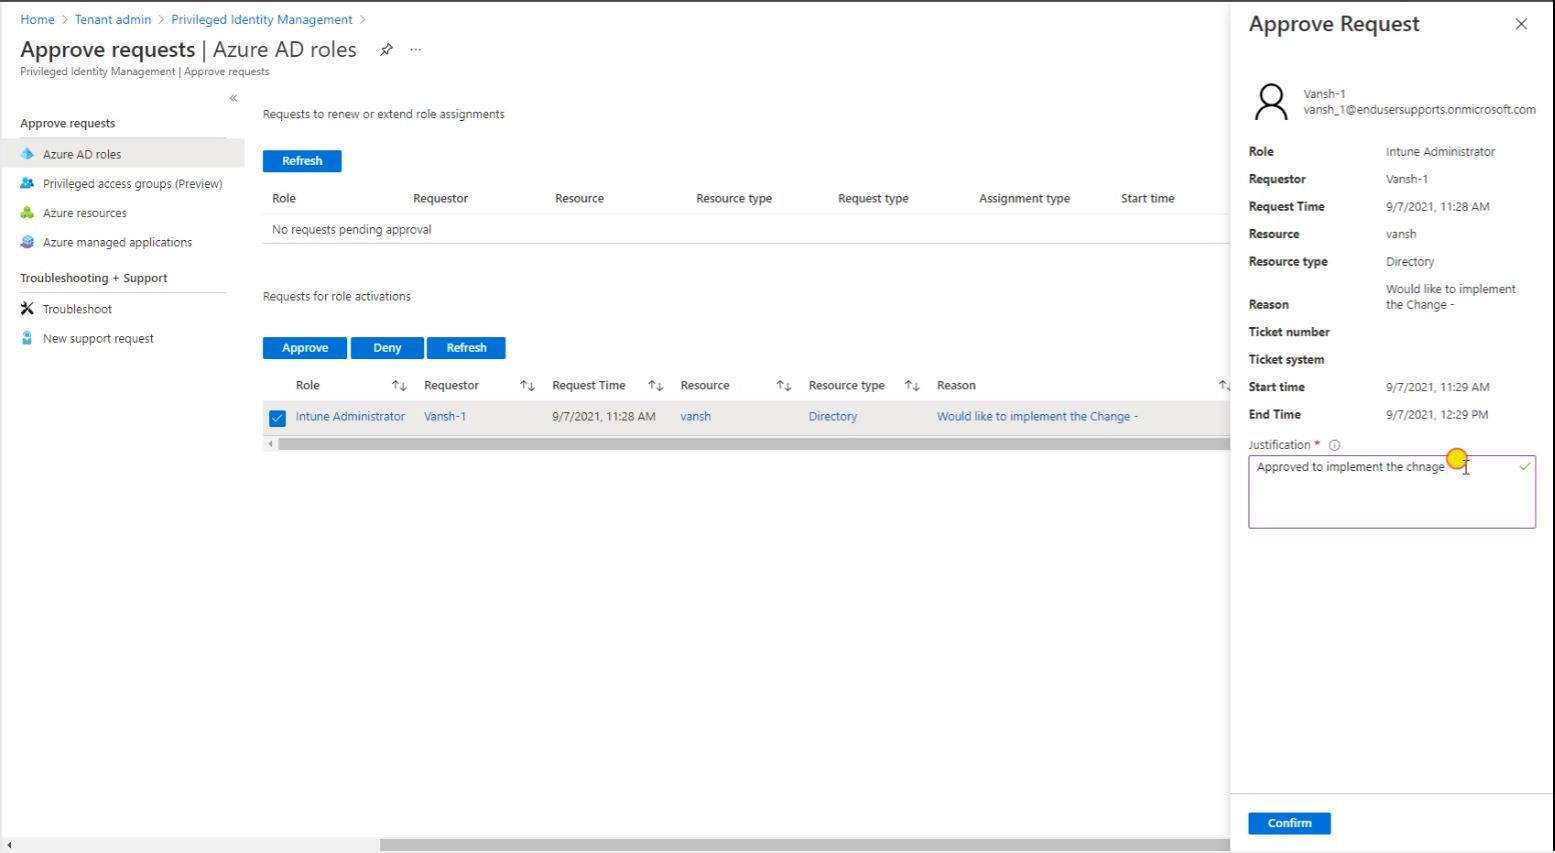
And now Refresh it.
So go to the Intune Administrator so still it’s No Permission, So logout this and login it again with the my Account.
After the login go to the Tenant Administrator.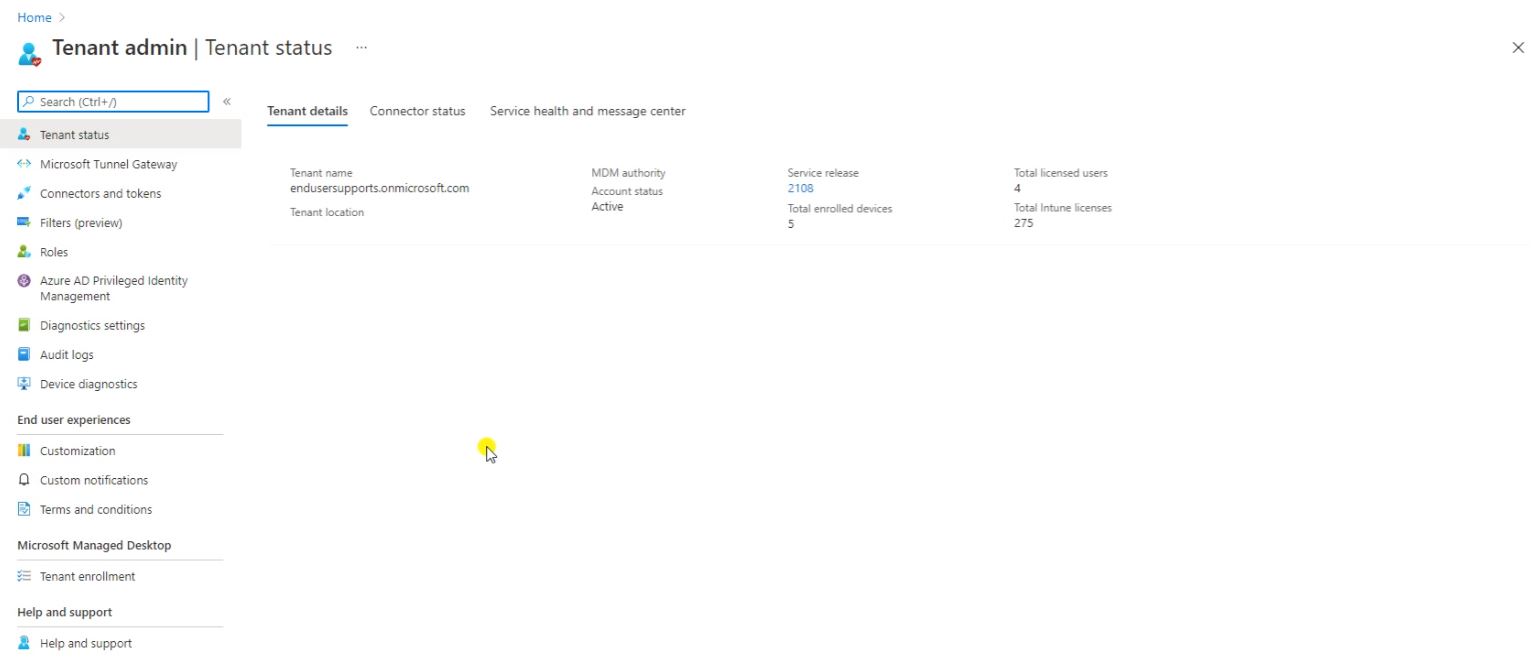
So Approver will receive the Email.
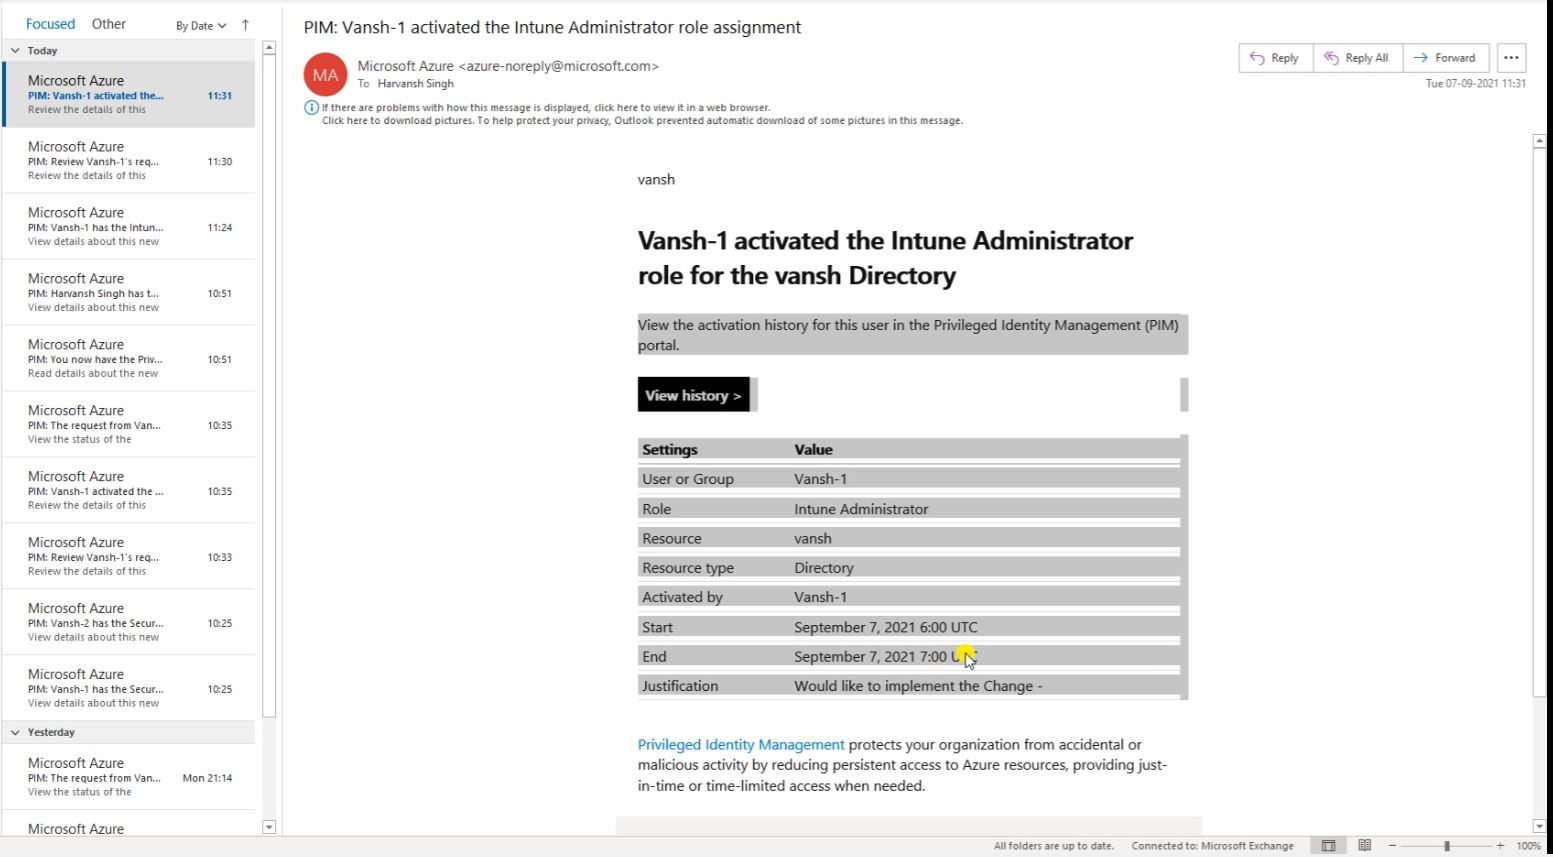
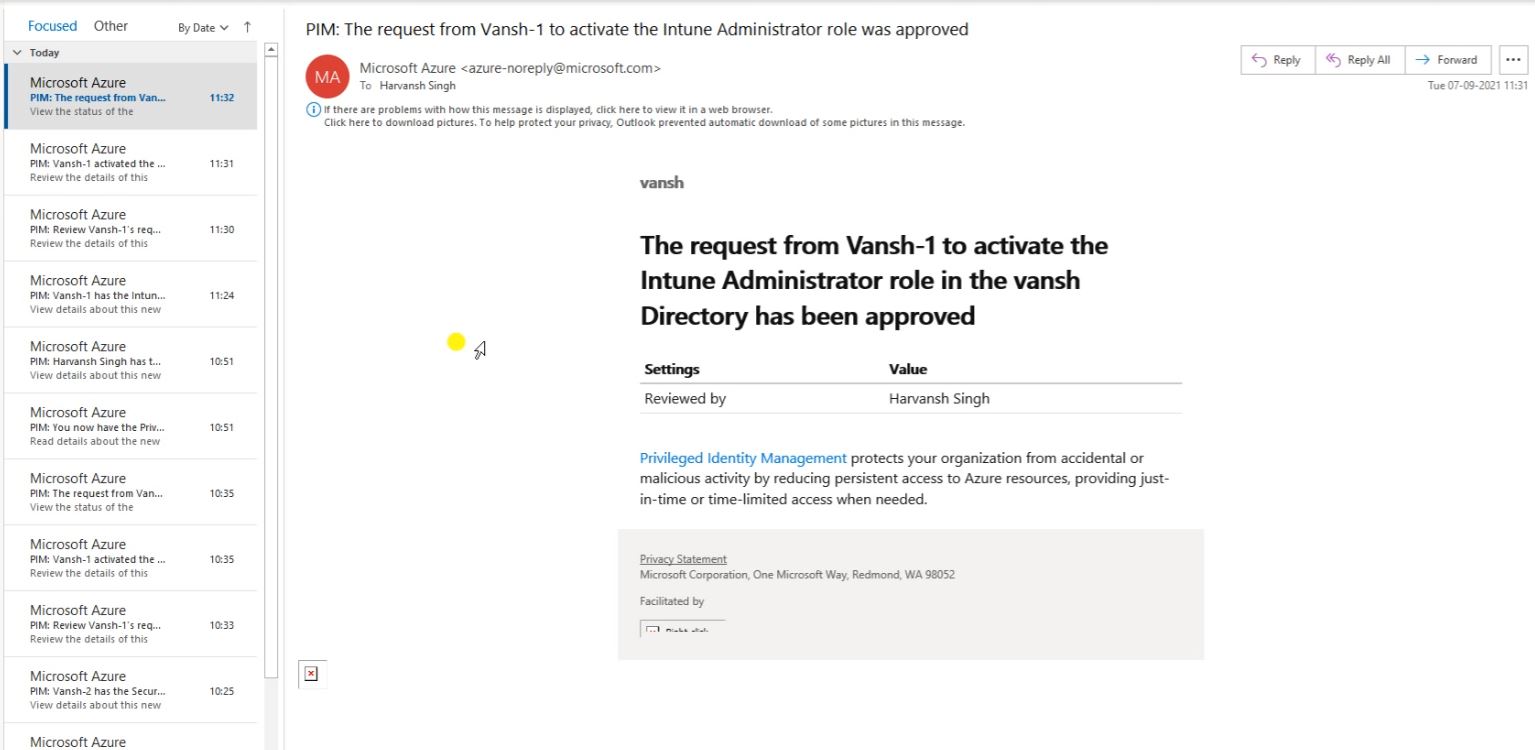
The Email part again the approval will receive the email.
So here you can see the requestor and who is the requestor. And he raised a request the PIM access, So these are the detail.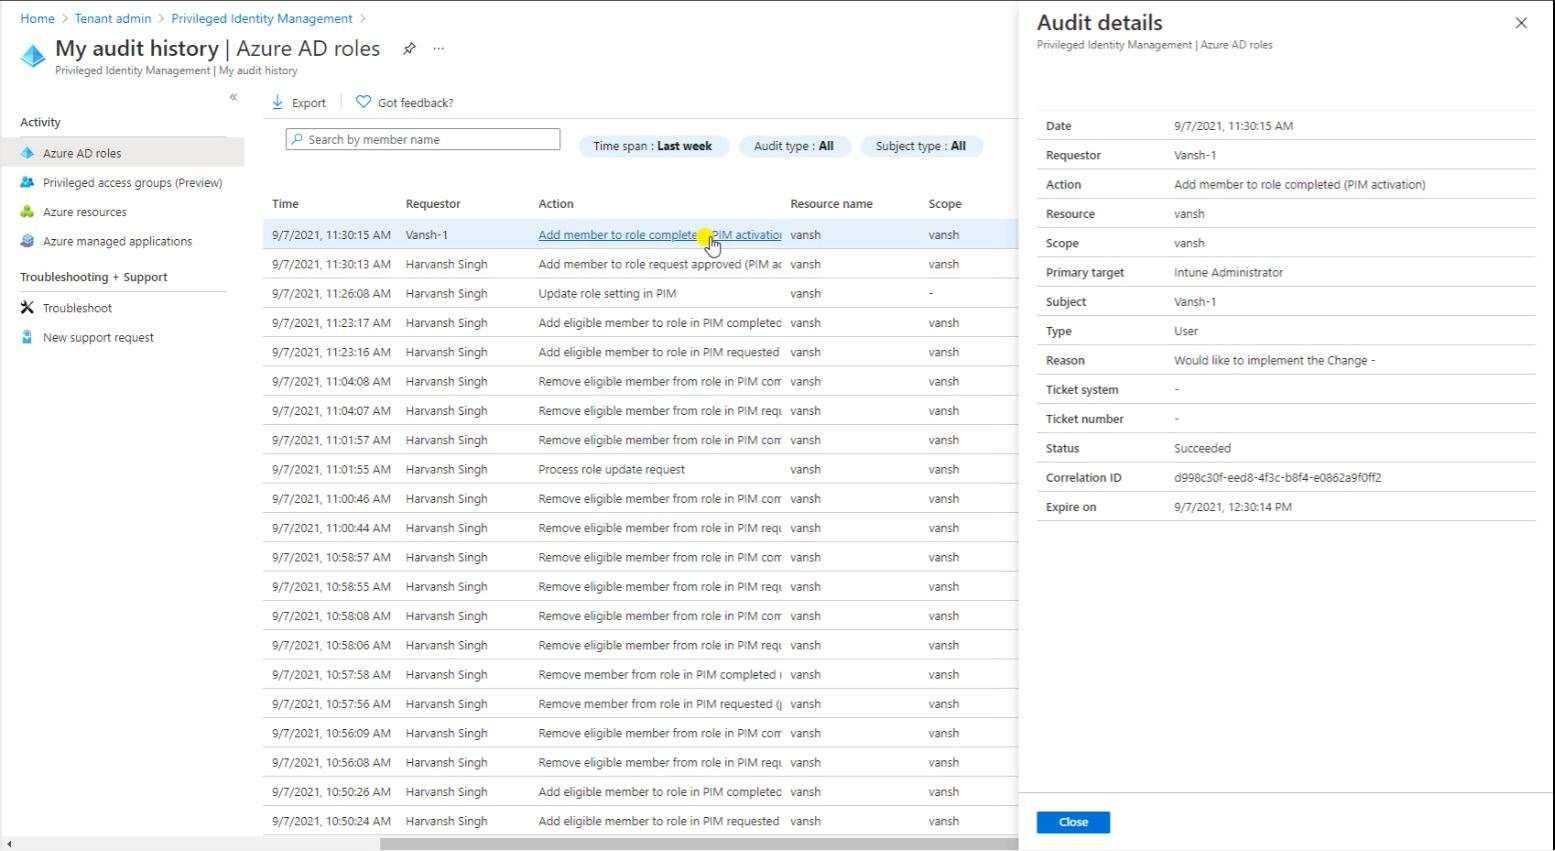
Harvansh Singh
